MAIN MENU
CATALOG INDEX
BY ALPHABETICAL
ORDER
For more info:
JSi@jsits.com
- [ Automatic
Film Applicators ]
- [ CHLOR*TEST™
Salt
Detection
Kit ]
-
[ Cross Hatch
Cutter ]
- [ Elcometer
456 ]
- [ Gloss Meter
Novo-Curve ]
- [ Hiding Power
Meter ]
- [ Novo-Gloss
]
- [ Novo-Haze
Haze meter ]
- [ Novo-Shade
45/0 Reflectometer ]
- [
Oven-logger ]
- [ Paint Inspection
Gage ]
- [ Powder Thickness
Gauge (non-contact) Model 550 ]
- [
Statistical
Novo-Gloss ]
- [ Surface
Preparation ]
- [ Testex Tape &
Thickness Gauge ]
- [ Traceable
Thickness
Standards
- [ Ultrasonic
coating
thickness
gauge
]
- [ Wet
film hiding power meter ]
- [ Wet Film
Thickness
Measurement ]
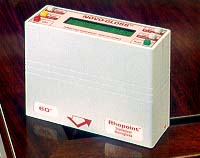
| The new Statistical Novo-Gloss instruments complete the world's first fully comprehensive range of gloss meters, providing precise definition of gloss on virtually every measurable surface in accordance with national and international standards. |  |
The most important of the many attractive features of this series are reliability, ease of use, reproductibility and traceability of calibration. Full traceability of gloss standards and a rapid but economical recalibration service provide the continuity needed when meeting BS 5750/ISO 9000 in respect of colour or gloss in conformity with BS 3900/ISO 2813.
Supplied complete with cased high gloss, traceable, calibration standard and zero reference. Mains adaptor/battery charger, cleaning kit, spare lamp, RS 232 computer connecting cable, all robust carrying case.
Specifications:
- Instrument range : 20° ISO; 20° TAPPI;
45° ASTM; 45° BS; 45° BSe; 60° ISO; 75° TAPPI; 75° JIS; 85° ISO;
20°-60°-75°; 20°-60°-85°; 20°-60°;
Reflectometer 45°/0° - Auto-ranging facility : Gloss measurement 0.1 to 1000 gloss units. Same instrument used for paint, plastics, substrate metal, plating, metallised plastics.
- Display : 24 Ch 2 line "Super Twist" Dot Matrix gives high contrast ratio and wide viewing angle.
- Continuous Reading : With the read button depressed continuous readings can be taken to assess the variation on the surface.
- Full calibration facilities : In conformity with ISO, DIN, BS, ASTM and all national standards, plus settable auto calibration.
- Calibration tiles : Certificated and traceable to BAM. Intermediate calibration standards available to check linearity down to 5 and up to 950 gloss units.
- Operation : All functions are push button operations.
- Automatic zero : No zero drift.
- Source : Tungsten halogen filtered to illuminant C with infra-red compensation.
- Coincidental vertical plane measurement : Multiple angle instruments read the same surface from identical direction.
- Auto compensation for lamp ageing : Negligible calibration drift using patented exclusive opto/electrical compensation arrangement.
- Lamp replacement : Long life lamps easily replaced in minutes. Spare lamp supplied.
- Statistics : Max, Min, Average, Number of Readings, Standard Deviation.
- Memory : Memory to 999 readings in
each angle.
Data in memory downloads directly via RS232 port to printer or computer (no interrogate programme needed). Data retained in memory after download until deliberately reset. - False entry delete : False readings can be deleted in turn and the statistics are automatically corrected.
- Disable facility : A very simple entry modifies operation to that of a simple non-statistical glossmeter. Re-enable entry restores statistical functions.
- Mains and battery : Mains recharger unit also serves as a mains adaptor if batteries discharged.
- Accuracy : 0.5 gloss units
- Repeatability : 0.5 gloss units when used in accordance with international standard ISO 2813